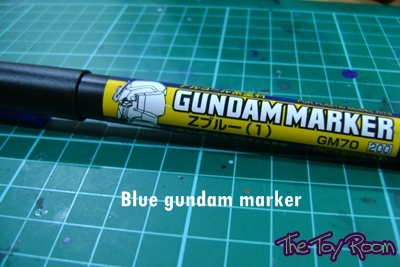
My first encounter with painting during my first few builds was using the gundam paint markers. They come in a nice thick marker pen for you to hold, they dry relatively fast and comes with quite an assortment of colors. For those who don’t want to spend so much time in setting up its the ideal solution for painting.
They are very good for small areas such as V fins, tubes.. however when it comes to big areas I think that is where they lose out. I’ll be experimenting on a flat surface for this..well enough talking lets get to it!


 Key point when it comes to gundam markers, shake and shake often. I swore my arm was stronger after this session. Squeezing the paint marker down will help the paint to flow to the tip. Helps to give a nicer flow of the paint.

 This is the one crucial step, waiting for the paint to dry. If its still wet and up paint another layer you will just pick up the previous layer with your marker


 By paint in different directions it can help to create an even surface.
 Well the end result! Though still not that good. Might need a few more coats!
I hope this guide will be useful I help those who use markers a lot. You can also apply this technique here to hand brushing ^^. By the way the true expert with markers is Ngee Khiong which you guys can check out his blog. He uses lots of gundam markers to great effect. Happy painting.
Till the next post!
This is soooooo helpful! Cos I got the markers and was like, what the fudge do I do with em? They’re not like pens… not like highlighters…
So very helpful!! And they do work really nicely, specially on small areas. Drying my spare Gelgoog head atm lol, Might matt topcoat it after to see what happens lol.
Heh thanks! Just a word of caution on the topcoat. Spray in little mist rather than a thick coat. I actually melted my paint job from overspraying with the topcoat last time!
Pingback: Gundam Markers GET! « Meimi132 no Itonami
i’ve got your link from ngeekhiong blogspot, and thanks this really helpfull….
Heh no prob ^^. Glad it was of help to you.
I dunno about you, but I found the paint in one direction instructions pretty useless… not from ur blog in case ur wondering… =P
I just paint it until it covers the whole surface, let it dry, then apply a second coat. works fine for me ^^
but then again… each to his own, eh?
Well haha, wonder where you saw that lol 😀 I used to paint in one direction but I realized it isn’t giving me pretty results. I changed to this and its slightly better haha ^^ Of course the spray can or hand brush will be more ideal.
And you are right. To each his own, just different paths to the same goal…I just want to get that damn spot covered!!! 😀
I saw that in Jusco in the gunpla section. xD
OMG lol….the great irony….
Pingback: The Toy Room 2010 in review « The Toy Room
I recently got into using the markers and I’ve run into a little problem with them: they got darker. Not on the model I expected that but, I resumed work on a model that I was painting in Char’s colors and my ‘pink’ looked dark orange and my gray was nearly black. I shook them the very first time I used them but not that time. Do they need to be shaken every use?
Hi NB, markers like bottled paints will have to shaken every time before you use them. If not only the thinner will come out resulting in what you are experiencing! What you can do now is let the current layers dry and then paint over them once you throughly shake your markers. Hope this helps!
Yes, thank you very much!
Hi, tried this method but my 2nd coat will always dissolve and scratch off the first coat, even after waiting one day. Any idea why? I’m using metallic gundam markers if it makes a difference, though I shouldn’t think so.
Hmm maybe your first coat was too thick resulting in the paint underneath still wet. And when you apply the second layer it just scratches off.
Are they adhesive to Soft PVC figures like some Ultra Hero Series!?
Hi Raymond, sorry for the late replies but I have no experience using it on PVC material. Put lacquer based paint should be able to work on soft PVC.